The Complete Guide to Achieving a Vibration Finish on Stainless Steel with a Premium PVD Coating | Ronaq Al-Masar
Stainless steel finishes are a fundamental element of visual identity and luxury detailing in high-end architectural projects—especially in hotels, villas, restaurants, and commercial buildings.
Among these finishes, Vibration Finish stands out for its calm, uniform appearance, its ability to hide scratches, and the refined texture it gives the metal surface. Many luxury projects combine it with PVD coating, particularly colors like Aged Brass, to create a sophisticated metal piece that suits modern interior designs and premium facades.
This article presents the complete finishing process as implemented at Ronaq Al-Masar for Metal Works, step-by-step—from initial sheet preparation to final PVD application—with technical explanations suitable for engineers, fit-out companies, and specialists in luxury metal fabrication.
What Is Vibration Finish?
It is a mechanical finish that creates a soft, overlapping circular pattern on stainless steel using abrasive non-woven pads.
This finish is characterized by:
- Concealing minor surface defects
- Providing a smooth, refined texture
- Offering a non-reflective surface (unlike Mirror or Hairline finishes)
- Suitability for both indoor and outdoor applications
It is widely used in:
- Luxury cladding facades
- Metal doors and windows
- Interior decorative panels
- Decorative staircases
- Tabletops and custom metal artworks
Why Vibration Cannot Be Applied Directly Without Sanding
Many fabrication shops assume that Vibration alone can hide surface defects, but in reality, it is a final finish, not a defect-removal process.
It must be preceded by full sanding for the following reasons:
- Removing laser-cutting heat marks and cutting lines
- Smoothing the surface after bending or rolling, which leaves micro-scratches
- Eliminating welding marks to avoid dark spots after finishing
- Creating a smooth, uniform surface that allows the Vibration pattern to spread evenly
Without proper preparation, the finish will appear uneven with shiny or dark patches.
Step 1: Mechanical Fabrication (Before Any Finishing)
1. Laser Cutting
This must be done before any surface finishing.
Key requirements:
- Adjust laser power to reduce burn marks
- Clean edges if needed
- Keep the protective film on the sheet as much as possible
2. Bending
Bending comes after cutting and before finishing, as it may cause:
- Pressure lines
- Scratches from tooling
- Variations in surface gloss
The surface must be protected during bending using protective tape or scratch-resistant plastic.
3. Rolling
Must be completed before Vibration and PVD because it may leave slip marks on the sheet.
4. Welding
TIG welding is recommended for premium projects.
Weld discoloration should be removed using an appropriate Flap Disc.
Step 2: Base Sanding
This crucial step removes all fabrication marks and opens the surface for a uniform finish.
Typical sanding sequence:
- 80 grit — Removes weld marks and deep scratches
- 120 grit — Softens the previous sanding lines
- 180 grit — Smooths the surface in preparation
- 320 grit — Final sanding before Vibration
This sequence ensures the Vibration effect spreads evenly without blotching.
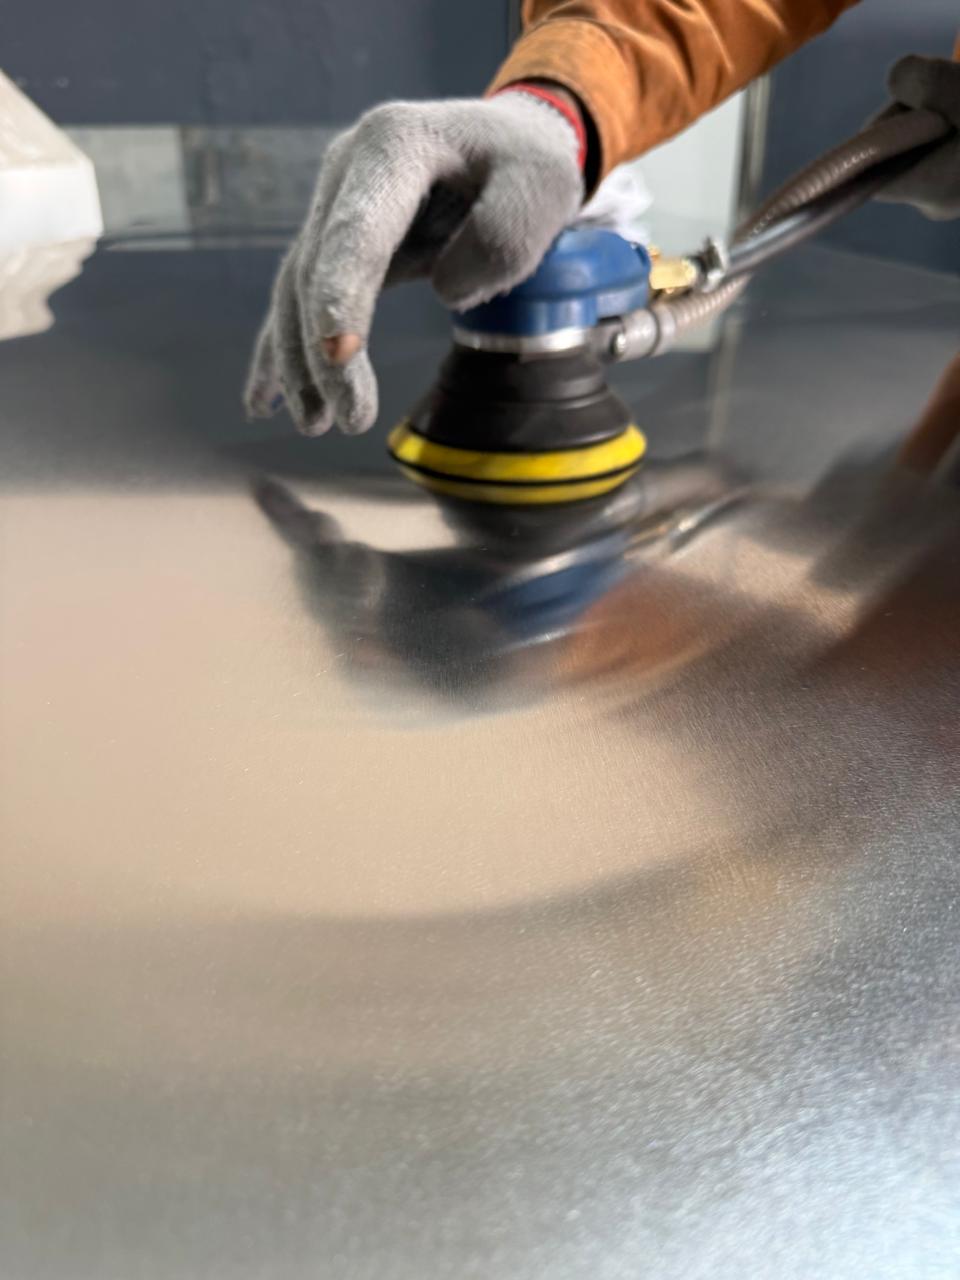
Step 3: Applying the Vibration Finish
Tools Used:
- Dual-action sander
- Non-woven pads
- Surface conditioning discs
- Specialized Vibration pads
Method:
- Apply overlapping circular motions (cross-circular)
- Use light, consistent pressure
- Maintain constant speed
- Cover the entire surface with the same number of passes
- Clean the surface between steps
Quality Indicators:
- No dark circular spots (caused by excessive pressure)
- No shiny patches
- Uniform Vibration texture across the entire sheet
Step 4: Cleaning Before PVD
Before entering the coating chamber:
- Remove all oils, dust, and sanding residue
- Use a stainless-steel solvent cleaner
- Allow the sheet to dry without touching it
- Inspect under strong or side lighting
Even a tiny oil mark will appear as a clear stain after PVD.
Step 5: PVD Coating – Aged Brass or Other Colors
PVD is one of the most luxurious finishing technologies offered by Ronaq Al-Masar.
It relies on physical vapor deposition in a vacuum chamber to deposit hard metallic layers—such as titanium or zirconium—onto the stainless surface.
Steps of PVD Application:
- Place the piece inside the vacuum chamber
- Evacuate air to achieve very low pressure
- Heat the stainless surface for adhesion
- Vaporize the metal using Magnetron or Cathodic Arc systems
- Deposit the colored layer to the required thickness and hardness
- Cool the piece and evaluate the color under daylight lighting
Advantages of PVD:
- High scratch resistance
- Corrosion and weather resistance
- Color stability
- Luxurious appearance ideal for premium projects
Step 6: Final Inspection – Quality Control
After coating:
- Check color uniformity
- Verify color match (Aged Brass, Gold, Black, etc.)
- Ensure no streaks or stains
- Carefully inspect edges and corners
- Examine for micro-cracks, especially in bent or curved areas
Step 7: Packaging and Transport
To ensure the product arrives without scratches:
- Wrap the piece with soft foam sheets
- Separate each piece individually
- Use PVC protection when necessary
- Avoid metal-to-metal contact during transport
Common Mistakes to Avoid
- Laser cutting after Vibration or PVD
- Bending after coating (causes peeling)
- Excessive pressure during Vibration
- Using worn-out pads or a dirty surface
- Touching the surface immediately after pre-PVD cleaning
Conclusion
Achieving a high-quality Vibration Finish followed by a premium PVD coating requires strict adherence to process sequencing—multiple sanding stages, precise vibration finishing, proper cleaning, and finally the PVD application as the last step.
At Ronaq Al-Masar, we follow the highest standards at every stage to deliver luxury finishes that meet the expectations of exceptional projects in Saudi Arabia and beyond.
